How to enter product options
The ‘product options’ feature allows you to sell a range of variations (incl. sizes, colors, lengths etc.) for each product. You can configure the settings of each product variation you’ve created, such as the product number, stock and purchase price.
1. Create a new set of product options
There are two ways to create a set of product options, either through the ‘Product options’ menu in the admin panel, on the left-hand side, or through the ‘Edit product’ screen. Either way, the procedure is the same. In the example below, we chose to add a set of product options using the ‘Product options’ menu in the admin panel, on the left-hand side.
- Click on the ‘Product options’ menu in the admin panel, on the left-hand side.
We are now going to create a new set of product options.
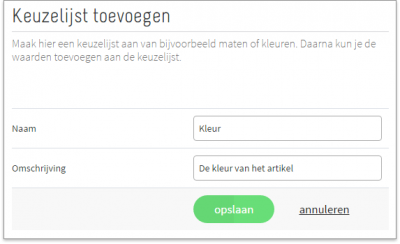
- Click on the ‘Add new product option’ button.
- Enter the name of your product options.
The name will be displayed to customers, so keep it clear and simple. - Enter a description
Which will not be shown to customers. - Click on ‘Save’.
2. Add product options
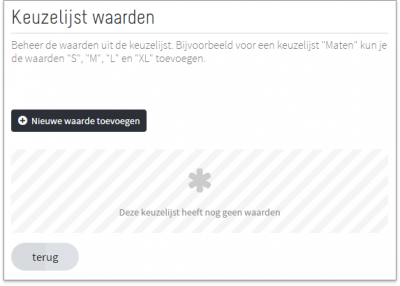
A screen will automatically appear where you can add ‘product-option values’, or simply put, the options your customers will be able to view.
- Click on ‘Add new option value’.
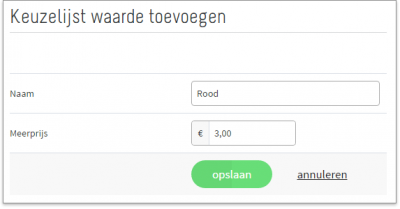
- Enter the name of the product-option value.
- Enter the additional charge for this value.
- Click on ‘Save’.
Repeat this step until you have added all your product-option values.
Done?
- Click on ‘Save’.
Tip
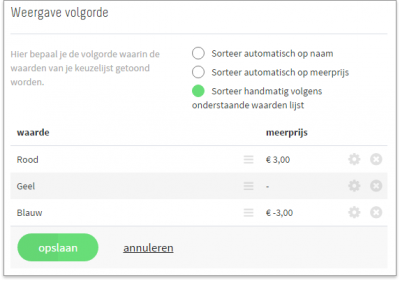
The surcharge for a product-option value is calculated based on the price of the product linked to the product option. If a price reduction applies, enter the price preceded by the minus symbol (-), for example, ‘-3.00’. If you do not want to enter a surcharge or reduction, leave the field empty or enter ‘0.00’.
3. Link your product options to a specific product
You have successfully created a set of product-options. Well done! Now all you need to do is link it to a new or existing product.
- Go to the product that you would like to link to the product options.
- At the bottom of your screen, click on ‘Add product options’.

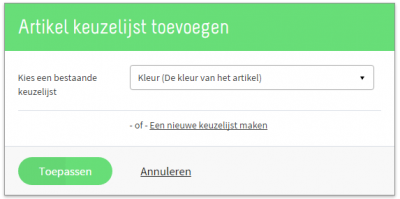
A screen will appear where you can link the new set of product options to your product.
- Select the set of product options in question.
- Click on ‘Apply’.
Tip
In the screen above you can also add a new set of product options. And it’s just as easy, if not easier, since you don’t have to leave the product page to create a new set of product options.
Click on ‘Apply’ to link the set of product options to your product. That’s it! Your customers will undoubtedly be delighted with this great feature!
Don’t forget to save the product! ;)

