DIY: create a great header for your store


A great header is a must for every online store. Not only does it determine your visitors’ first impressions of your store, it also shows them what to expect. We regularly receive queries on headers, so we thought it would be useful to clarify some important points.
First off, what’s a header?
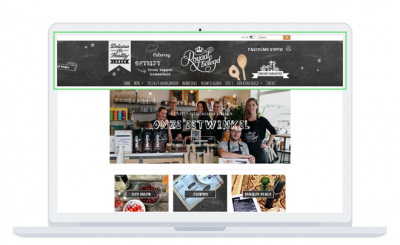
The header is the top part of your online store, and it can be considered the equivalent of a billboard, since it’s the first thing your visitors see, regardless of the page they land on. It only takes visitors ten seconds to decide whether or not it’s worth browsing your site, so this first impression is very important.

A good header
The header of your online store determines whether your visitors’ first impression is a good or bad one. The following elements are a must in any good header:
- Logo: there’s no header without a logo, as this key element shows your visitors who you are, and on top of that, it also makes your store instantly recognizable.
- Search bar: this helps customers quickly find what they’re looking for, which boosts your store’s user-friendliness.
- Shopping cart: needless to say, easy access to the shopping cart and payment process in just a few easy clicks is a must on all pages.
The header is also the ideal location to include:
- USPs (Unique Selling Points): such as ‘free shipping’ and ‘ordered today, delivered tomorrow’. USPs can convince hesitating customers to make a purchase and boost your traffic.
- Payment methods and/or shipping partners: add specifications in your header to highlight you offer payment via iDEAL or shipping via PostNL, for example.
- Contact details: add the phone number of your customer service, for example, as this boosts your reliability and shows your customers your online store offers a comprehensive service.
- Quality label(s): if you have any quality labels, add them to your header to show your store is reliable.
Is your store streamlined and minimalistic, and would you rather not add too much information in your header? No problem, you can include it in your footer instead.
A prime example: STAYATHOME
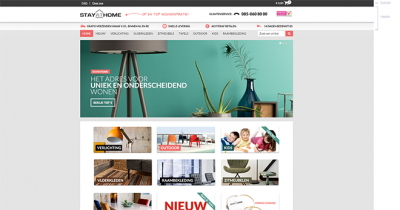
Enough with all this theory, let’s have a look at a real-life example. The header of STAYATHOME, an online store selling products for the home, features many of the elements listed above and has both a header bar (the black bar with a link to the FAQs and the ‘About us’ section) and a header. The DIY guidelines below are based on this example. Let’s get started!
Tip: before you start, make a sketch of the header you would like to create and gather all the necessary information and files, such as images.

Step 1: Configure your header
As you can see in the example, the STAYATHOME header is just as wide as the other elements on the website. To configure your header, go to ‘Settings/Design/Store layout’ and enter a width of 1,100 pixels. Also make sure you tick both ‘header bar’ and ‘header’.

As you can see on the screenshot, the STAYATHOME shopping cart is in the top right-hand corner, with the search bar right below it. You can recreate this on your webpages by dragging these elements to the location of your choice.

Step 2: Design your header
Once you’ve configured your header, it’s time to move on to the design phase. You can use photo-editing programs like Photoshop and Pixlr to create custom images.
Once you’re happy with the image you’ve created, you can add it to your store by clicking on ‘Settings/Design/Template settings/Page header’.
Important note! You need to configure the header bar separately, so don’t include it in your image. To configure the design of your header bar go to ‘Settings/Design/Template settings/Page header’.
Logo creator
Our logo creator allows you to create your very own logo in just a few easy clicks. It’s the ideal solution if you’re not a Photoshop or design whiz. Do bear in mind, though, that the logo creator can only be used to design a logo, not to add additional elements to it, such as USPs.
Step 3: Link your header to your homepage
Good news! Your header is automatically linked to your homepage without you needing to configure anything. You can also add shortcuts to your header bar. To find out how, click here.
Tips
- Create a header image that is 2,200 pixels wide so that it covers the entire width of our store and it is suitable for any screen size. Go to ‘Settings/Design/Layout’ to get started.
- Include key information only in the central 1,100 pixels so that it can be read clearly even on smaller screens.
- Use a maximum header image height of 400 pixels.
- Save your header image in .jpg, .gif or .png (transparent) format.
- To find out how to add a header, click here.
I hope this post has been helpful! :) Which elements does your header include?
